
Uncategorized
Video Learning Blog 3 – Shot Lists
Aug
Introduction to Creating a Shot List
When we talk about “shot lists” in the professional filmmaking business, we often talk about all the different lenses, frame rates and other fancy camera equipment we might use. While we’ll get into more about some of that fun gear stuff later, I will talk about it here as if you are using a smartphone or other simple video camera setup.
The reality is that the quality of what is possible on smartphones has changed so quickly, there isn’t that much discussion about how to use them for video production. This is especially true for things that will be edited later, like a short documentary style video. That lack of conversation about it doesn’t mean it can’t be done. I think a lot of youtube folks, and certainly the majority of folks on instagram or other places you might watch videos, are doing it all with their phone. But, the film industry doesn’t focus on that because it doesn’t sell new cameras.
Would I suggest that you forever use a smartphone to shoot videos? Maybe, maybe not. The more knowledge and experience you build in creating videos, the more you may find that using a phone is limiting. But, would I let not having access to a fancy camera stop you from getting started? Absolutely not.
When I start thinking about generating a shot list for a video project, I go back to the simple story board that I create initially. I try to think through each of the different scenes or locations that I intend to film. But, chances are there will be many unknowns about a location, so I also apply a simple formula that we can talk about more in-depth later in this lesson.
I will almost always have a printed out shot list with me during a video shoot, so I can easily review it as I’m working. I try not to think of it as a limiting factor – I’m not just checking off each item on the list and then I’m done. I think of the shot list as the minimum of what I think I need to be able to move on from one scene to the next.
Some Background
Often when I’m travelling away from home to do a documentary, someone else will be paying for the travel. In Alaska, it can be expensive and time consuming to get to many of the rural towns and villages. In these rare opportunities, I try to make the most of the travel and shoot as many videos as possible.
After shooting 3 videos in 3 days, I had some time before the flight back home – and was able to get in touch with a famous author who lives in Haines. I knew I would only have a few hours, so the night before I tried my best to make sure I knew what scenes we could capture. With such limited time, and only one real location – her home – I needed to get creative to break it up and add some visual interest to the video.
I’ve chosen to highlight this video because it is another very simple one, in terms of the scope and number of locations. It was shot quickly, and so it is easy to highlight the technique that goes into “making something out of nothing” and how important planning is – such as having a complete and thought out shot list.
How Many Shots Do I Need?
This video is almost exactly 4 minutes long – but it only has about 35 individual shots. In order to sustain that length of time in one location (her house and yard) I needed to think carefully about how to structure our time. I also needed to create several different smaller scenes, within the house area. I’ll go ahead and list the different scenes I planned out, which would have originally gone in a story board for this video:
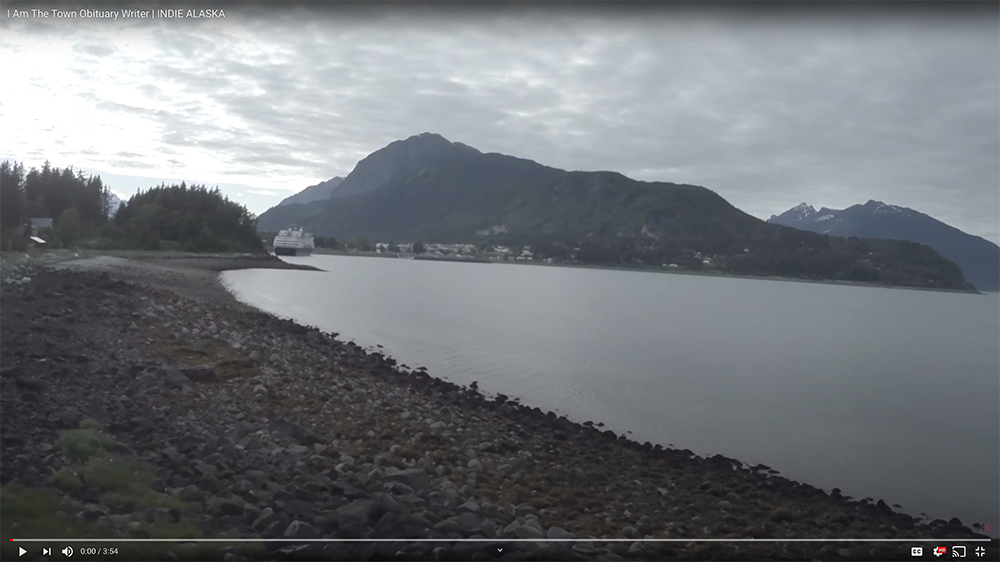
1. Establishing shots of Haines
2. Establishing shots of the house exterior
3. Establishing shots of the interior of the house
4. Subject doing the dishes
5. Subject making coffee / tea in the kitchen
6. Subject drinking her tea in the living room
7. Subject typing at her desk, other items of inside her office
8. Subject on the phone, talking to a colleague
9. Subject walking her dogs on the beach outside the house
In addition to these scenes, I also shot several others that did not make it into the final documentary. These included her feeding her chickens, driving around town in her car, babysitting her grandchild, eating lunch, and making homemade playdough with the child. By having more material than I needed to use for the final video, I had a lot more flexibility in deciding what the actual visual story would look like.
While I only used 35 shots in the final video, I actually shot closer to 150. But, how do I decide what each of those shots should be?
For each scene, I know I need several different shots in order to be able to edit them together to create a longer “sequence” – multiple related shots edited together. Most of the time, this ends up being broken down into a very basic formula of four types of shots: Wide, Medium, Tight and an alternate angle. So for my shot list, I would simply write that down for the scene.
Scene 1. Establishing shots of Haines
Wide shot of town and the water
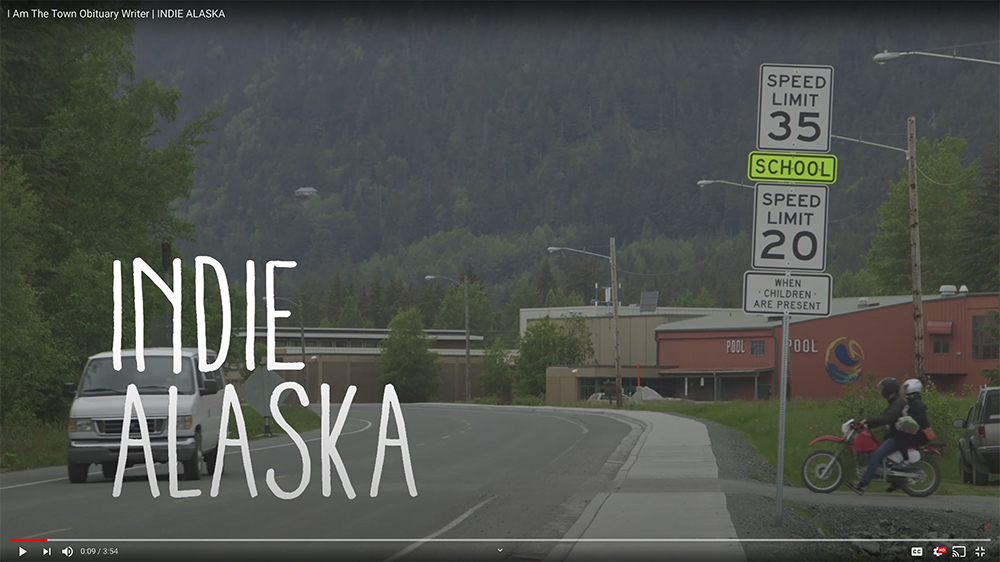
Medium shot of cars going through town
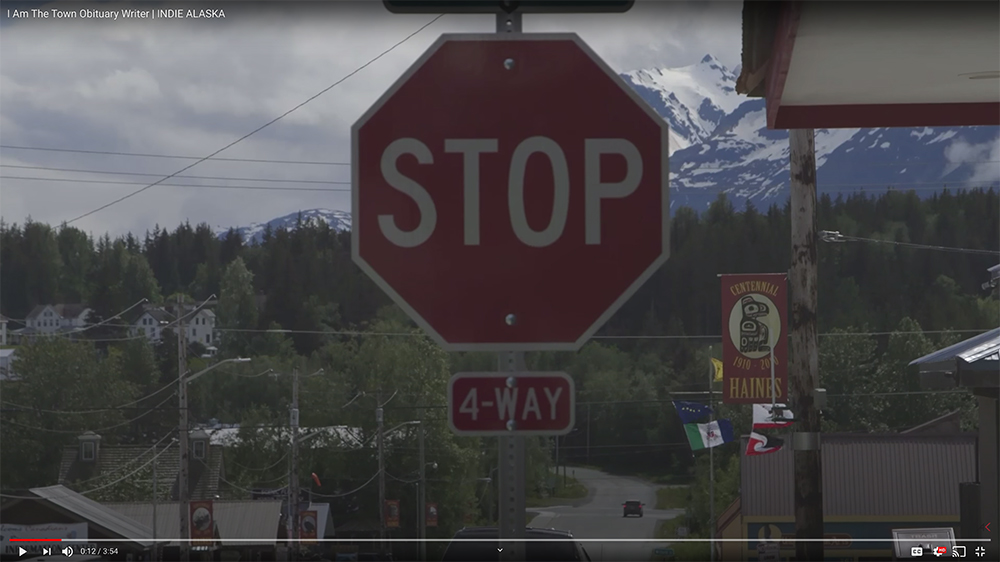
Tight shot of a street view
When you watch the video, you can see this in action. In fact, you can see it in the three opening shots:
Shot 1 – Wide view of Haines
Shot 2 – Medium shot of traffic
Shot 3 – A tight shot, in this case a stop sign
As you watch the video, you can see me repeating this same formula for each of the scenes. So, for example, when I show the subject in her office typing – I start outside the door to show a wide angle of her to establish where she is. Then, the next shot is a medium shot of her typing. Finally, we see a close up of her hands typing. It’s a simple formula, but it works.
It’s good to keep in mind that the three establishing shots of town that I used were not the only shots that I had. In fact, I probably spent an hour or more walking around town, capturing a number of different options that were wide, medium, tight – as well as abstract and alternate angles.
What is an Alternate Angle?
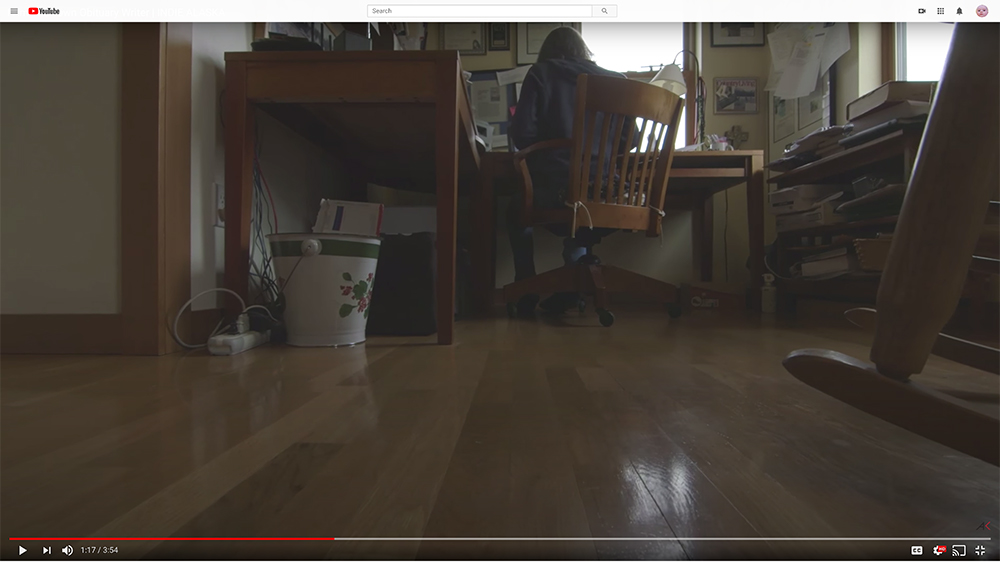
If we go back to the scene that shows the subject typing, we can see I start with a normal medium shot of her typing, so I can see both her face, the computer and her hands. After I had got that shot from both wide, medium and tight – I looked for alternate views I could get. This “alternate angle” could be a shot from directly above her, looking down. Or, perhaps I could place the camera behind the computer screen, so I could see her face straight on.
In this case, I chose the following alternate angle. I put the camera down on the floor, and shot from a low angle. You can think of it as her dog’s eye view of her working. Again, this is just to give more visual interest, and allow me to extend the scene longer without having to linger on the same basic shots for too long. This is really an opportunity to get creative, and have fun with the scene outside of the basic “wide, medium, tight” shots that are the bread and butter of the scene.
Abstract Shots
These are the kinds of shots I feel like I can never get enough of. Oftentimes, they’re just “stuff” around the house, or wherever the scene is taking place. They could be photos on the fridge, plaques or awards on the wall of an office, or other nicknacks. Another really good go-to is flowers or grass, blowing in the wind outside. An empty swing. Boots in the mudroom. A child’s chalk on the mudroom bench.
The purpose of these shots is multifold. First, they can be used to help extend the sense of time, so if the speaker continues talking, but the sequence of your scene has already ended – you can extend the scene. Second, they help you move from one scene to another. It can be jarring to cut from a shot of a person in one place directly to a shot of them in another. You might feel like the person magically teleported from their desk to the beach in front of their house. But, if you cut in some abstract shots, that transition can be eased. Third, I try to find images that while abstract, tell you more about the scene. Some kind of meaningful detail, not just arbitrary images.
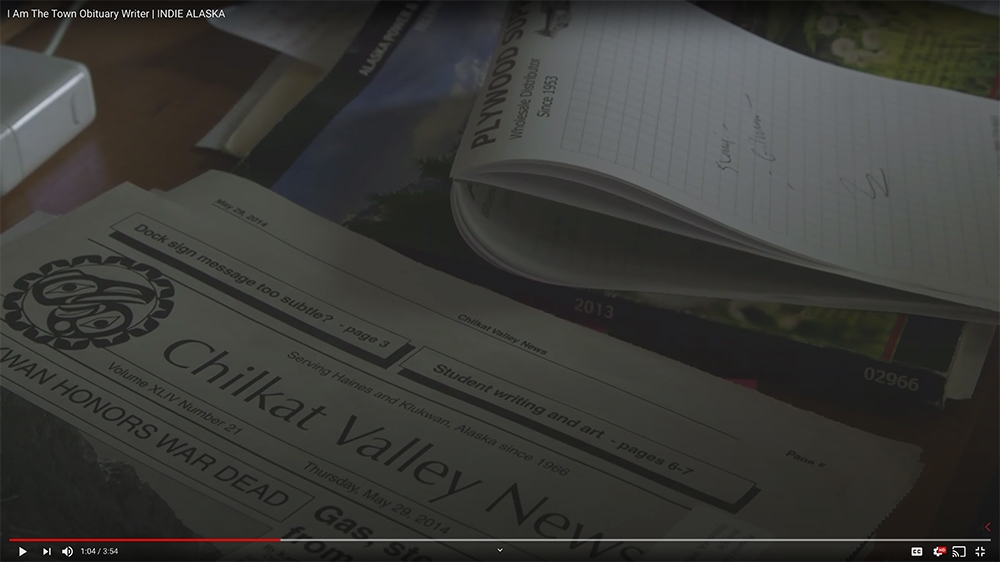
In this example, the abstract shot does all of the things described above. By getting a shot of the newspaper she is writing for, it provides more context for the topic she is talking about. In addition, it gives a sense of something near to her in the scene that she might be looking at. While these suggestions are subtle to the viewer, it all helps to build the scene and make it feel more complete. In a well crafted video, every shot has a purpose and is chosen carefully to contribute to the overall “sense of place” or tone of the piece.
A Quick Exercise
Watch the video again. This time, you can even mute the volume so you can be solely focused on the visuals. Look for the Wide, Medium, Tight sequence in each scene. Look for alternate angles and how I use abstract shots in order to move from scene to scene. Can you find places where I am breaking the rules? Sometimes you’ll play with the simple formula to make the video more interesting.
When I watch someone else’s work, I’ll almost always watch it multiple times. The first viewing, I’m likely engrossed in the story. On the next viewing I can see more of the visual elements. By a third viewing, I can much better understand what the editor is doing, what techniques they are using, and how the video is constructed.